
Thursday, 17 January 2013
Top Tips is moving!
In future I will be posting top tips in Picture It Blog - trying to make life less complicated! So please hop over to my main blog from now on!

Tuesday, 8 November 2011
Venice revisited and revamped

I was a keen amateur photographer back in those days and took oodles of very average pictures whilst we were in Venice. I was pleased with a handful of them (I've even sold one or two!) but had relegated the rest to a sub folder somewhere in the bowels of my computer hard drive. Today's book purchase inspired me to unearth and reappraise my Venice "snapshots", with the knowledge that these days I am more of a dab hand at editing images.
And I was very pleasantly surprised! With a little cropping, tweaking of exposure, levels and brightness I found I had around 20 very nice images. They're not of a professional standard and I'd hope that nowadays I'd produce much better, but I've been able to create a very attractive collage of memories that will eventually adorn the walls of our downstairs loo!

This is the final collage - I'm going to get it printed at around 30cm x 30cm. I've stolen the quotes from Tessa Kiros' book - I hope she doesn't mind as it's only for our loo - but they epitomise our weekend in Venice, especially the part about getting lost but it not being a problem. We set off from our lovely hotel each morning and just walked and walked. We stopped to eat when we were hungry, whiling away a few hours in cosy little bars serving prosecco and cicchetti (delicious bites!). We usually didn't have a clue where we were and only consulted a map when it was time to find our way back.
Just as a comparison I've created a collage of the images before any editing, to show just what a few simple tweaks can achieve. It makes an OK collage, but the final version (above) is much more vibrant and punchy, I like the occasional use of black and white and I love the addition of the quotes.

If you'd like to learn how to create very simple but really impactful and personal pictoral memories of special events in your life just get in touch. I run one to one tuition sessions at very reasonable prices. http://www.picture-it-big.co.uk/Onetoone.html. Even better get someone to treat you to it - I have gift vouchers too. All those photos should not be languishing hidden on your computer when they could be bringing back nice memories every day!
Monday, 7 November 2011
Should I buy an SLR camera?
I get asked this all the time when I’m teaching people with compact cameras, so I decided to try to write a blog that will help you make that decision before you part with your hard earned cash.
Firstly let’s take a quick look at the types of camera out there as it may be surprising to some that compact cameras and SLRs are not the only options available.
Compact camera: Often referred to as a “point and shoot” camera and is designed for ease of use and convenience. It does not offer interchangeable lenses, has a built in flash and has many automatic modes to make picture taking as simple as possible. Some do feature options for controlling aperture and shutter speed and there are some with extremely good lens or optic quality.
(I’ll do SLR next although really it should come last as you’ll see shortly).
SLR camera: stands for Single Lens Reflex but you don’t really need to know that! It uses a system of moving mirrors to allow the photographer to see exactly what they are going to capture (What You See Is What You Get – WYSIWYG). Non SLR cameras (the other three types discussed here) do not use this mirror system. SLRs also allow you to use interchangeable lenses, have full control over aperture and shutter speed, use manual as well as auto focus and use additional filters and flashguns. Basically you get more control and can be much more creative than with a compact camera.
As I said earlier these are not the only two options and the alternatives are well worth taking into consideration.
Bridge Camera: bridges the gap between compact cameras and SLRs, hence the name. Bridge cameras are often a similar size to small or entry level SLRs and have common features. They do not have interchangeable lenses and usually have a lower ISO range (meaning that they won’t perform as well in low light). They have a fixed but very versatile lens which allows you to photograph close up and wide angle through to telephoto, with the zoom limit often being very high.
Compact System Camera: More recently manufacturers have brought out a fourth option designed to have interchangeable lenses and all of the flexibility of an SLR but in a much more compact body.
So now that you know about four options instead of just two, how on earth do you decide which is the right one for you?! I’ve used all except the newer compact system camera (if any of the manufacturers would like me to do a review of one, feel free to pop one in the post!) and they’ve all got their place in the market. It really comes down to what sort of photography you want to do, how much money you want to spend and whether you like carrying and changing lenses or just prefer one that does it all.
Perhaps describing how I use my cameras will shed some light. I stick my compact camera in the bag whenever I’m going out with the kids and might want some quick snapshots. I know there’s quite a delay when I take pictures, I can’t get the nice soft focus background shots I love and I can’t capture close ups of faraway things. However, in good daylight conditions it delivers great quality snapshots. I have also done some really nice close ups with it. Shots taken with the flash aren’t great, but then I am used to using an SLR with external flash gun.
I use my bridge camera when I want to get better quality pictures than with my compact but don’t want to carry additional lenses. A good example of this was on a recent holiday to Cape Verde where I didn’t want to risk taking an SLR and all the lenses. Sandy beaches and SLRs don’t mix well! My bridge camera has a 20X zoom so I knew I could get some good candid pictures of the kids playing in the pool and on the beach. It also does some great close ups with soft focus backgrounds and the image quality is better, sharper and crisper than the compact. It also has an optical viewfinder which I prefer to the LCD screen.
I bought this bridge camera as a natural step up from a compact, when I was still an amateur photographer stuck on AUTO. I first started to see the limitations of it when I began an A Level evening course. I had my first play with an SLR and loved the quality both through the lens and in the final images. And of course there’s no delay when pressing the shutter (no more missed action shots!). Once I had tried a macro lens and an external flash gun I was hooked – there was no going back. However hard I tried I could not achieve the same quality of images or creative effects with my compact or bridge camera.
SLR cameras also allow you to shoot in RAW as well as JPEG. This gives you much more control when editing your pictures afterwards, a must for a professional photographer (some bridge cameras do offer this format as well).
If speed and image quality are important to you, if you’d like to enlarge your shots for display on the wall or enter them into competitions then you should probably go for an SLR. But only if you are prepared to spend money on additional lenses. The “kit” lens that usually comes with an SLR does not allow you to take real close up shots nor does it zoom very far, so you’ll soon find that you need at least one additional lens. You can buy lenses that have a similar wide range to bridge cameras (e.g. 18mm-200mm) but the quality is not as good as dedicated close up, wide angle or zoom lenses. I soon found that I needed a macro (close up) lens and a zoom lens. But then I’m selling my images. If I was an amateur photographer on a budget the one “Jack of all trades” lens is perfectly adequate, certainly when you first start out using an SLR. You can also save money by buying generic lenses such as Tamron or Sigma and by buying second hand.
For me, using an SLR feels like a “proper” camera – I can look through a view finder, it instantly takes the picture when I press the shutter button and has a real and satisfying feel, it’s fast and overall a more quality experience. If automatic modes fail to give the result I am looking for I can take control and make fine-tuned adjustments. A bridge camera can do this too but the quality is generally not as good, with more noise (speckled dark areas) on the final image and just not as crisp and punchy. I know that if I use a particular lens with my SLR I can achieve a particular result – it gives me much more control.
I can’t truly answer the question of SLR cameras versus the new compact system cameras as I’ve yet to use one and can only rely on the reviews I’ve read. They seem to have a place in the market, based predominantly on compact size and being light weight, but opinion seems to be that although very good, they don’t always perform as well as SLRs in the more challenging lighting conditions.
All my cameras have their place and role to play and I'm sure I could come up with an argument to add a new compact system camera to my kit bag! If I was forced to give them all up except one I would hang onto an SLR - and it would be my mighty Canon 5D - I'll blog on why it knocks the socks off my 350d and 40d another day!
Whatever you decide to do, make use of the internet and read lots of reviews. Stay away from manufacturers’ reviews initially as they will be biased and stick to web sites that offer independent reviews e.g. http://www.cameras.co.uk/ but there are many others.
Jane Burkinshaw www.picture-it-big.co.uk
Monday, 4 July 2011

So, anyway, there I was today teaching her and her two friends how to take better photographs with their new SLR cameras. They were typical of the people I teach - they know how they want their pictures to look but get frustrated as they don't know how to achieve it. They consider their good pictures to be lucky snapshots. As ever, they are hard on themselves and have usually got a good eye for a nice image. Husbands and dads have tried to explain about apertures and shutter speeds but somehow the penny has never dropped and the camera has stayed on the fully AUTO mode (little green square).
By the end of my training sessions people usually tell me that I have cut through all the jargon and made it all make sense. Catherine commented today that she hadn't known what anything on the screen on the back of the camera had meant and that she was going away able to interpret it all and say what ISO setting she was on and why and what shutter speed and aperture she / the camera had used. Things like Auto White Balance and Exposure Compensation now made sense.
On week days I train at an amazing venue - Davenports Farm Shop at Bartington on the A49. The staff are very friendly and accommodating, giving over an entire room free of charge in the Alice in Wonderland themed tea rooms to me. The choice of tea and coffee is dizzying but Belinda will guide you through and select the best one with you and all the food is locally sourced and freshly prepared by Belinda and her husband. The cakes are to die for - I drooled so much over the miniature cakes served to two ladies nearby that they donated the ones they couldn't quite manage to us!
I combine the classroom sessions with practical exercises outside and Davenports has oodles of interesting subjects. Today we concentrated on the outdoor chess set, practising using the Av mode to set different apertures to increasingly blur the background and also seeing how zooming in compresses perspective. On previous courses we've photographed the ostriches and alpachas, flowers, fruit and veg, old fencing - the opportunities are endless.
A 4 hour course costs £100, whether it's one person or 3, so getting some friends along to share the cost obviously makes sense. 2-3 people is ideal to get sufficient 1:2:1 attention, but also to generate a buzz and good atmosphere. If you like the sound of it get in touch and we'll sort out a convenient date. I can tailor the courses to suit particular interests e.g. portraits / close up flowers etc. All in all I am always told that it's a great day out and very informative and practical.
Wednesday, 25 May 2011
New Digital Photography Taster Courses for 2011
If you want to take great pictures you need a lot of expensive kit and you need to understand all the technical stuff - don't you?
No, not necessarily. Of course great quality cameras and lenses and an understanding of how to use all the settings can help you to produce fabulous images. But if you don't know some basic rules or tips then it doesn't matter how good your kit or technical knowledge is. Occasionally I leave all my SLRs, lenses etc at home and just take my Panasonic DMC-FS12 compact with me to remind myself of the basics. I also like to demonstrate that you can get some really good shots with a compact camera.
 |
| All these shots were taken with a compact camera |
This led me to thinking about how easy it is really and how everyone can take good shots if they just have some simple tips and techniques.
That's what's inspired me to run some taster courses in 2011. I love running courses - so much so that I'd do it for free if I could, but I have bills to pay, cosmetics, shoes and clothes to buy!
The idea of these taster courses is to give people some completely non-techie knowledge that they can go out and put into practise straightaway and see an immediate improvement in their photographs.
If this sounds like it's for you please get in touch. I'm running two courses - one in June and one in July. Details are on my web site. The taster courses are just £20 per person for two hours.
If you're ready for for the next step - getting off the AUTO button and finding out what all the different settings do then take a look at the workshops and small group courses I offer.
To book or find out more contact Jane on 07868 750505 or via http://www.picture-it-big.co.uk/
Thursday, 7 April 2011
How to take great pictures of babies

From the moment they explode into our lives babies are amazing! For something so small they have a massive impact on everything we do. Life as we knew it ceases to be and the world revolves around them. We are totally governed by their every need and mesmerized by their very prescence. Go on, admit it, you've idled away many a moment just watching your precious new arrival sleeping and breathing. It's no surprise that we take literally hundreds of photographs, trying to capture every expression and moment. And it's not easy is it?! New babies sleep for England and when they're awake their eyes can't focus and can look a bit bozz eyed for the camera! Well, here's a few helpful hints to ensure that you make the most of this magical, albeit brief time.
Photograph newborns when they're asleep... because it's easier and also because they look so cute! In the first two weeks a newborn baby will still tend to curl up its legs and arms when asleep and it's such a beautiful pose. It's nice to get one or two shots with eyes open just to be able to remember how they looked, but concentrate on sleeping poses. The best time is when baby has been changed and fed and has gone into a deep sleep. I'm sure you've realised that nothing short of an explosion will wake them and it's surprisingly easy to move them into nice positions.
Turn your camera flash off... and put your baby in a snuggly, safe and warm place where the natural daylight from outside is falling onto them. Avoid areas of bright sunlight as it creates harsh shadows. My children used to have a crib under the living room window and in the afternoon the light was wonderful. Hold your camera nice and steady, lean against a wall for extra support if possible.

Photograph hands and feet... and include your own hands for a sense of scale and to create a picture full of emotional impact. Zoom in nice and close or use the Macro setting on your camera. Check where you are focusing so that the right part of the picture will be in focus - read my previous blog post to find out more (scroll down to the next blog).
If you've enjoyed my blog please leave me a comment! If you're interested in photography lessons or know someone that would like a newborn shoot then please just get in touch with me!
Tel: 07868 750505
Thursday, 17 March 2011
Are you making this basic mistake when taking photographs?
When I run courses and one to one sessions on Digital Photography I find that most people are making the same fundamental mistake. And don't get me wrong, I don't think they're idiots - in fact they are intelligent individuals who are keen to improve their photography skills. The blame lies with the people who write camera manuals that are laborious to read and full of jargon. I always advise people to put the manual away and a) come on one of my workshops (of course!) and b) read some of the photography books I recommend. Once you've got some basics on board, then the manual starts to make a bit more sense, but is best used as a reference tool - look things up as you need to but don't try to read it from cover to cover.
If camera manuals were well written they would start with a few simple bits of information that would get you started on the right path, but this stuff is usually hidden deep in the manual and called something technical!
So, here's the "biggie" mistake you may be making with your point and shoot compact camera. When you just point your camera at your subject and press the shutter, the camera always focuses in the middle of the frame and that's what will be in focus. 8 times out of 10 that may well be absolutely fine. But what if you are photographing two people and there's a gap between them? Your camera will focus in between the people, making the background in focus and the people blurred. Go on, be honest, you've done this before haven't you!
Did you know that you can focus on one of the people, press the shutter halfway down until the green light comes on and the camera beeps, telling you that it has focused, then keeping the shutter button pressed halfway, move the camera to frame both people and then fully press the shutter down to take the picture. If you practise this a few times, it's really easy and then eventually becomes second nature.

And once you've got the hang of it, you can start to put people, objects etc to one side of your picture and not in the middle. Radical! An example of this might be if you're photographing someone with a lovely landscape behind them. Try putting the person to one side. This may also have the lovely effect of keeping the person in focus whilst the landscape is softly out of focus. In the example below it is our lovely Daisy sulking as she watches people playing on the beach below (no dogs allowed), with St Michael's Mount in the background.
 This technique is called FOCUS LOCK - sounds scary doesn't it? But it's so simple and so important!Look it up in your manual now that you know what it is.You can then start to get creative and take pictures of all sorts of things with the point of focus wherever you want it to be. And practise it - after all you can just delete any that don't work.
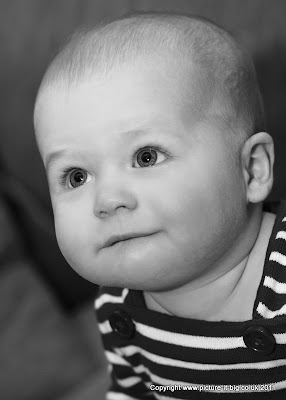
And if you're taking close up pictures of people's faces ALWAYS makes sure you focus on the eyes. If the eyes aren't in focus your picture just won't work.
If you found this interesting and useful please let me know - tick a box below the post and write a comment. If you want to know about my courses visit my web site http://www.picture-it-big.co.uk/Courses.html
If camera manuals were well written they would start with a few simple bits of information that would get you started on the right path, but this stuff is usually hidden deep in the manual and called something technical!
So, here's the "biggie" mistake you may be making with your point and shoot compact camera. When you just point your camera at your subject and press the shutter, the camera always focuses in the middle of the frame and that's what will be in focus. 8 times out of 10 that may well be absolutely fine. But what if you are photographing two people and there's a gap between them? Your camera will focus in between the people, making the background in focus and the people blurred. Go on, be honest, you've done this before haven't you!
Did you know that you can focus on one of the people, press the shutter halfway down until the green light comes on and the camera beeps, telling you that it has focused, then keeping the shutter button pressed halfway, move the camera to frame both people and then fully press the shutter down to take the picture. If you practise this a few times, it's really easy and then eventually becomes second nature.

And once you've got the hang of it, you can start to put people, objects etc to one side of your picture and not in the middle. Radical! An example of this might be if you're photographing someone with a lovely landscape behind them. Try putting the person to one side. This may also have the lovely effect of keeping the person in focus whilst the landscape is softly out of focus. In the example below it is our lovely Daisy sulking as she watches people playing on the beach below (no dogs allowed), with St Michael's Mount in the background.

And if you're taking close up pictures of people's faces ALWAYS makes sure you focus on the eyes. If the eyes aren't in focus your picture just won't work.

If you found this interesting and useful please let me know - tick a box below the post and write a comment. If you want to know about my courses visit my web site http://www.picture-it-big.co.uk/Courses.html
Friday, 18 February 2011
Make hay whilst the sun shines, but don't take close ups of flowers!
Here's a likely scenario. Sunday morning, you wake up, open the curtains and it's a lovely sunny day. There's a high chance that you'll then say, "let's go out somewhere and make the most of the nice weather". You might choose to go and visit a local garden, treat yourself to a cream tea and buy a new plant for your own slice of Eden. If you're more likely to go mountain biking or to the pub there's probably not much point reading on.
 Let's discuss the weather first. The sun is beating down, there's not a cloud in the azure blue sky. Perfect conditions for strolling around admiring luscious lawns and beds bursting with flowers of every hue. Out comes the camera and you're clicking away. A close up of a cream rose with petals edged with a delicate pink, a bee burrowing into the centre of a foxglove. Perfect! You can't wait to look at the pictures and you might even use the one of the rose to make a birthday card for someone.
This happens if the flower is in direct sunlight. Ideally you should find one that is in the shade or use the shade of your own body. I tried a couple of options with the hellebore to demonstrate the difference.


 Let's look now at flowers photographed in shade - ones you might have overlooked at the time because they didn't seem as attractive as the ones lit by the sun. The light is much more even and the colours are more saturated and intense. Petal and stamen details are not hidden in shadow. Of course it's sods law that the most photogenic flowers in the whole garden were the ones in bright sunlight!

If you've opted for the garden then bear with me. Chances are you'll take your camera with you, hoping to get a half decent shot or two to remind you of your visit and perhaps show to some like minded gardeners / appreciators. What I'm about to tell you will significantly increase the odds of your photographs being more than half decent.
 Let's discuss the weather first. The sun is beating down, there's not a cloud in the azure blue sky. Perfect conditions for strolling around admiring luscious lawns and beds bursting with flowers of every hue. Out comes the camera and you're clicking away. A close up of a cream rose with petals edged with a delicate pink, a bee burrowing into the centre of a foxglove. Perfect! You can't wait to look at the pictures and you might even use the one of the rose to make a birthday card for someone.
Unfortunately there's a good chance that you'll be somewhat disappointed when you load them onto your computer. The camera doesn't always see what we see. Our eyes are used to evening out the contrasts between light and shade but the camera records faithfully with the result that your picture is likely to have very dark shadows and be lacking lots of the lovely details you remembered seeing.
This happens if the flower is in direct sunlight. Ideally you should find one that is in the shade or use the shade of your own body. I tried a couple of options with the hellebore to demonstrate the difference.


Both the above shots are better than the original one, with less deep shadows and the intensity of the pink petals and green leaves works very well.
 Let's look now at flowers photographed in shade - ones you might have overlooked at the time because they didn't seem as attractive as the ones lit by the sun. The light is much more even and the colours are more saturated and intense. Petal and stamen details are not hidden in shadow. Of course it's sods law that the most photogenic flowers in the whole garden were the ones in bright sunlight!
But I hope I've made my point. Direct sunlight is not great for photographing flowers in close up. But you'll be pleased it hear that it is good for photographing garden scenes - just make sure the sun is off to one side or behind you - not directly in front!

All these pictures were taken at Bluebell Cottage Gardens, which opens 30th March 2011.
Thursday, 17 February 2011
Is AUTO only for beginners (and what the heck is"P")?
“Oh, I never take my camera off AUTO”. A very frequent comment when I talk to people about their photography. Usually said with an air of slight embarrassment as if it’s something to be ashamed about. They would be pleasantly surprised and reassured to hear that I often have my camera on an AUTO mode (although I use the P automatic mode – more on that later). I have lots of gadgets and machines in my home that offer a variety of settings and I only use one all the time – the dishwasher springs to mind. If I choose the ECO setting it does what I want it to and I feel good that I’ve done something slightly environmentally friendly. I know there are faster and hotter settings, salt rinses etc but I’ve never bothered to work out how to use them and I don’t really care as long as my dishes are sparkling. It’s like that with a camera – as long as AUTO allows you to take a good photo and get the result you want, you don’t need to go off piste and try the other settings. So it’s fine to set your camera to AUTO, but it's better that it’s a conscious decision rather than the only option.
Regular readers of my blogs (I fool myself into thinking there are a few!) will be familiar with my views on technological knowhow versus the role of opportunity and having a natural eye. You could know how to use every setting on your camera but still be unable to spot a good shot or perhaps not even have the camera with you when a great shot presents itself. Taking a good picture relies primarily on being in the right place at the right time, an ability to see that something before you has the making of a good image and having your camera at the ready. In many instances these elements will be sufficient and so will having the camera set to AUTO. However, there are situations where the automatic setting cannot get the best results and if you haven’t got other options then you won’t get the optimum shot. You may have already experienced the frustration of spotting a great photo opportunity, only to find that the shot is blurred or wrongly exposed, despite the fact that your camera has previously delivered great results for you.
LIGHT – or not enough of it may be the cause of the majority of your problems when using the camera on AUTO. The camera automatically sets the shutter speed to suit the available light. On a dull day or in deep shade it will use a slower shutter speed to let more light in. This can mean that although the resulting photograph will be correctly exposed any movement may be blurred or the whole picture may suffer from camera shake. Your camera is quite clever and knows this and will decide to fire the flash to provide some extra light. This might not give you the effect you were looking for as flash can be quite harsh or unflattering. If you take the camera off the AUTO setting you would have a number of options available to you, to stop the flash firing and increase the amount of light coming into the camera without slowing down the shutter speed too much. Setting a larger aperture (lower F number) with the AV (aperture value) setting or increasing the ISO would probably work.
 You might be thinking that this is not particularly relevant for you but there are lots of circumstances where you could come across dull light conditions during the day. I have done several shoots in woodland areas and have found that the canopy of leaves reduces the light to such an extent that my subjects are blurred if they are moving e.g. running, waving, even just walking. Flash can just kill the atmosphere and make the background appear unnaturally dark. Using other camera settings has enabled me to still get the shot I was looking for.
Another common instance when you might benefit from moving off AUTO is when you are photographing something or someone against a cluttered background. If you are zooming in on the subject then the background will start to blur but you can control how much it blurs and how much your subject stands out by using the AV setting and using a larger aperture (lower F number).
 Taking the camera off AUTO and knowing what setting to use instead puts you in control rather than the camera. When I use an automatic setting I make a conscious choice rather than using it because I don’t know what else to try.
Note that I said “an automatic setting” not the AUTO setting. You may not be aware of it but your camera is likely to offer a semi-automatic mode called P or “Program Mode”. In this mode you can make some of the decisions for yourself and make some corrections. For example you decide when to use the flash – it doesn’t fire automatically. You also have the option to make the picture lighter or darker using something called Exposure Compensation. And you would also be able to change a number of other settings whilst still letting the camera automatically set the shutter speed and aperture size.
It can be quite scary when you go off piste (off AUTO) for the first time, but what have you got to lose? If you make a mistake you can delete it and try again. I experimented with the AV setting by propping my foot up on a stool one day and taking pictures of my big toe with different apertures! Needless to say you won’t find those shots on my web site! And try the TV (time value) setting to increase and decrease the shutter speed with a moving subject – I have lots of photos of blurred running dog progressively becoming in focus running dog!
Not sure about apertures and shutter speeds? Forget your manual, it’s unlikely to help you and sadly neither will many of the magazines and books which claim to be guides to digital photography. In my experience they all assume a certain level of knowledge and tend to jump in at quite a technical level. The best quick introduction I’ve found is in Annabel William’s book “99 portrait Photo Ideas” where she tells you just enough to go out and have a go. Then once you’ve had a play around and grasped the basics that’s the time to start looking at the books and delving in a little deeper.

It’s easier to practise these settings outside in daylight, so do a bit of reading in the evening, use the Quick Set Up Guide, which hopefully came with your camera, to learn how to change the AV and TV settings and then get out with your camera during the day. And don’t forget that AUTO is there for a reason – it will give you a good shot in many circumstances – but go on, be a devil, try the P setting sometimes too! You’ll soon find that you’ll be using that in preference to AUTO and before you know it you’ll be flicking onto AV and TV too.
Check out my courses for beginners in digital photography where I cover this and much more – with as little jargon as possible!
Regular readers of my blogs (I fool myself into thinking there are a few!) will be familiar with my views on technological knowhow versus the role of opportunity and having a natural eye. You could know how to use every setting on your camera but still be unable to spot a good shot or perhaps not even have the camera with you when a great shot presents itself. Taking a good picture relies primarily on being in the right place at the right time, an ability to see that something before you has the making of a good image and having your camera at the ready. In many instances these elements will be sufficient and so will having the camera set to AUTO. However, there are situations where the automatic setting cannot get the best results and if you haven’t got other options then you won’t get the optimum shot. You may have already experienced the frustration of spotting a great photo opportunity, only to find that the shot is blurred or wrongly exposed, despite the fact that your camera has previously delivered great results for you.
LIGHT – or not enough of it may be the cause of the majority of your problems when using the camera on AUTO. The camera automatically sets the shutter speed to suit the available light. On a dull day or in deep shade it will use a slower shutter speed to let more light in. This can mean that although the resulting photograph will be correctly exposed any movement may be blurred or the whole picture may suffer from camera shake. Your camera is quite clever and knows this and will decide to fire the flash to provide some extra light. This might not give you the effect you were looking for as flash can be quite harsh or unflattering. If you take the camera off the AUTO setting you would have a number of options available to you, to stop the flash firing and increase the amount of light coming into the camera without slowing down the shutter speed too much. Setting a larger aperture (lower F number) with the AV (aperture value) setting or increasing the ISO would probably work.

Another common instance when you might benefit from moving off AUTO is when you are photographing something or someone against a cluttered background. If you are zooming in on the subject then the background will start to blur but you can control how much it blurs and how much your subject stands out by using the AV setting and using a larger aperture (lower F number).

Note that I said “an automatic setting” not the AUTO setting. You may not be aware of it but your camera is likely to offer a semi-automatic mode called P or “Program Mode”. In this mode you can make some of the decisions for yourself and make some corrections. For example you decide when to use the flash – it doesn’t fire automatically. You also have the option to make the picture lighter or darker using something called Exposure Compensation. And you would also be able to change a number of other settings whilst still letting the camera automatically set the shutter speed and aperture size.
It can be quite scary when you go off piste (off AUTO) for the first time, but what have you got to lose? If you make a mistake you can delete it and try again. I experimented with the AV setting by propping my foot up on a stool one day and taking pictures of my big toe with different apertures! Needless to say you won’t find those shots on my web site! And try the TV (time value) setting to increase and decrease the shutter speed with a moving subject – I have lots of photos of blurred running dog progressively becoming in focus running dog!
Not sure about apertures and shutter speeds? Forget your manual, it’s unlikely to help you and sadly neither will many of the magazines and books which claim to be guides to digital photography. In my experience they all assume a certain level of knowledge and tend to jump in at quite a technical level. The best quick introduction I’ve found is in Annabel William’s book “99 portrait Photo Ideas” where she tells you just enough to go out and have a go. Then once you’ve had a play around and grasped the basics that’s the time to start looking at the books and delving in a little deeper.

It’s easier to practise these settings outside in daylight, so do a bit of reading in the evening, use the Quick Set Up Guide, which hopefully came with your camera, to learn how to change the AV and TV settings and then get out with your camera during the day. And don’t forget that AUTO is there for a reason – it will give you a good shot in many circumstances – but go on, be a devil, try the P setting sometimes too! You’ll soon find that you’ll be using that in preference to AUTO and before you know it you’ll be flicking onto AV and TV too.
Check out my courses for beginners in digital photography where I cover this and much more – with as little jargon as possible!
Monday, 24 January 2011
Bloomin' gorgeous Winter


The landscape can seem pretty barren and drab at this time of year - everything can appear tired and faded, with barren fields and bare branches. At least this is what I used to think, but I've come to appreciate and love this time of year. Clearly it lacks the lushness and colourfulness of the other three
seasons but look for beauty in the landscape and you will find it. I particularly like the contrast of faded, almost yellow fields and burgundy brown bare hedges - Mother Nature never puts colours together that don't work and these two shades are stunning together. When everything else is stripped back the most simple details - bark on branches and single leaves for example - are often striking in their simplicity. The light is wonderful at this time of year as the sun is lower in the sky, making it softer and lighting everything from the side rather than directly above. You get lovely soft shadows modelling and contouring your subjects. The teasels in the first shot are light from behind by the diffused winter sun making the spikes stand out from the background. Focusing on them has thrown the reeds in the background out of focus and created the perfect back drop.
The solitary leaf in the second picture caught my eye. It almost looks like an insect's cocoon and along with the new buds on the twigs hints of Spring. The leaf stands out nicely against the background of diagonal twigs.
The first snowdrops and hellebores should be making an appearance sometime over the coming weeks. I've visited Rode Hall a few times to enjoy and photograph their snowdrop walk, but just google "snowdrop walks" at this time of year and you'll be spoilt for choice. Last year we had a lot of snow in February and I rushed out to capture snowdrops in snow but was disappointed to find that they looked less spectacular than when they are against a contrasting background of brown earth and green grass. My favourite images in the grouping below are the two bottom left, where leaves, mulch and pine cones provide interest, with just a hint of snow to suggest Winter.
When photographing anything at ground level at this time of year I always wear waterproof trousers or carry a bin liner, as you really need to get down at their level. Hellebores hide their beauty under their bonnet of petals and snowdrops are just so delicate that you need to get down low. To get a shot of a drift of snowdrops covering the woodland floor, you can stand up and avoid wet, muddy knees. But be aware of harsh, contrasting light if the sun is out and if it's a dull day be careful to avoid camera shake as the canopy of trees can make it quite dark. But NEVER use your flash unless you are looking for a very flat, stylised look. The best advice is to experiment - one of the benefits of digital photography!
seasons but look for beauty in the landscape and you will find it. I particularly like the contrast of faded, almost yellow fields and burgundy brown bare hedges - Mother Nature never puts colours together that don't work and these two shades are stunning together. When everything else is stripped back the most simple details - bark on branches and single leaves for example - are often striking in their simplicity. The light is wonderful at this time of year as the sun is lower in the sky, making it softer and lighting everything from the side rather than directly above. You get lovely soft shadows modelling and contouring your subjects. The teasels in the first shot are light from behind by the diffused winter sun making the spikes stand out from the background. Focusing on them has thrown the reeds in the background out of focus and created the perfect back drop.
The solitary leaf in the second picture caught my eye. It almost looks like an insect's cocoon and along with the new buds on the twigs hints of Spring. The leaf stands out nicely against the background of diagonal twigs.
The first snowdrops and hellebores should be making an appearance sometime over the coming weeks. I've visited Rode Hall a few times to enjoy and photograph their snowdrop walk, but just google "snowdrop walks" at this time of year and you'll be spoilt for choice. Last year we had a lot of snow in February and I rushed out to capture snowdrops in snow but was disappointed to find that they looked less spectacular than when they are against a contrasting background of brown earth and green grass. My favourite images in the grouping below are the two bottom left, where leaves, mulch and pine cones provide interest, with just a hint of snow to suggest Winter.
When photographing anything at ground level at this time of year I always wear waterproof trousers or carry a bin liner, as you really need to get down at their level. Hellebores hide their beauty under their bonnet of petals and snowdrops are just so delicate that you need to get down low. To get a shot of a drift of snowdrops covering the woodland floor, you can stand up and avoid wet, muddy knees. But be aware of harsh, contrasting light if the sun is out and if it's a dull day be careful to avoid camera shake as the canopy of trees can make it quite dark. But NEVER use your flash unless you are looking for a very flat, stylised look. The best advice is to experiment - one of the benefits of digital photography!


Friday, 10 December 2010
Taking great pictures over Christmas
We had our first Wincham / Pickmere photography group last night and talked about how to get good shots over Xmas, without getting too technical. Hope you find them useful.
“The best camera is the one you have with you at the time”.

Always have your camera near you so that if something happens you are ready to grab the shot. Taking great photos often isn’t about knowing how to use all the different settings, but more about OPPORTUNITY and being able to SEE THE IMAGE.
Take a few practise shots, check the results, adjust settings if necessary and you’ll be well prepared.
The best shots of people are often the candid ones, especially children. Get them used to you taking photos all the time and they will be less self conscious.
For posed photographs help make people relax by talking to them, make them laugh. Try getting people to say “Cheeky Monkeys” or “Smelly Socks” and after you’ve done one shot get people to tickle each other or hug.
If you want a more informal group shot ask people to toast each other, meeting each others’ eyes rather than looking at the camera. This can also reduce red eye. (But don’t worry about red eye and don’t use “Red eye reduction” setting on camera as the double flash is off putting and it takes longer so you can miss the moment. Sort out red eye on the computer afterwards.)
Get people really close together, heads nice and close and all on the same plane (i.e. not some further in front or behind the others as you could risk some being out of focus).
Take several shots of groups in case anyone had their eyes closed.
Fill the frame when taking pictures of people. Use the zoom on your camera to catch candid shots of the kids—they won’t know you’re taking the shot and zooming in has the effect of blurring the background, making the person stand out.
Try different angles—get down to the same level as your children or shoot from low down or high up. Tilt the camera slightly and take the picture on an angle. Experiment.
At night time or in low light try using the night portrait setting on your camera to capture the lovely Christmas lights / candles etc behind or near your subject. Make sure the flash is on and select night portrait. The camera fires a quick burst of flash but then keeps the shutter open for a moment longer to allow light in. Hold the camera steady or you’ll risk camera shake. Rest the camera on a level surface if possible. Try taking pictures of the children by the Christmas tree like this. Or of the Christmas pudding as it is aflame.
If you want to take a picture of Christmas lights in a town or garden etc, rest the camera on a wall, make sure the flash is off and press the shutter. You can do this in AUTO mode. If the picture is too dark, use the TV mode (Might be “S” on some cameras) and slow down the shutter speed. Experiment until you are happy with the shot.
If you are taking pictures of people on a bright sunny day outdoors, use the flash to avoid harsh shadows. Overcast days are actually the best for photographing people. Snowy overcast days are great as colours of scarves, hats etc look really intense against the white snow.
On cold frosty days look for interesting details and zoom in close—use the MACRO setting. Frosted cobwebs, reeds, teasels etc look magical covered in frost.
Landscapes—use rule of thirds, try to lead the eye, have a clear focal point.
“The best camera is the one you have with you at the time”.

Always have your camera near you so that if something happens you are ready to grab the shot. Taking great photos often isn’t about knowing how to use all the different settings, but more about OPPORTUNITY and being able to SEE THE IMAGE.
Take a few practise shots, check the results, adjust settings if necessary and you’ll be well prepared.
The best shots of people are often the candid ones, especially children. Get them used to you taking photos all the time and they will be less self conscious.
For posed photographs help make people relax by talking to them, make them laugh. Try getting people to say “Cheeky Monkeys” or “Smelly Socks” and after you’ve done one shot get people to tickle each other or hug.
If you want a more informal group shot ask people to toast each other, meeting each others’ eyes rather than looking at the camera. This can also reduce red eye. (But don’t worry about red eye and don’t use “Red eye reduction” setting on camera as the double flash is off putting and it takes longer so you can miss the moment. Sort out red eye on the computer afterwards.)
Get people really close together, heads nice and close and all on the same plane (i.e. not some further in front or behind the others as you could risk some being out of focus).
Take several shots of groups in case anyone had their eyes closed.
Fill the frame when taking pictures of people. Use the zoom on your camera to catch candid shots of the kids—they won’t know you’re taking the shot and zooming in has the effect of blurring the background, making the person stand out.
Try different angles—get down to the same level as your children or shoot from low down or high up. Tilt the camera slightly and take the picture on an angle. Experiment.
At night time or in low light try using the night portrait setting on your camera to capture the lovely Christmas lights / candles etc behind or near your subject. Make sure the flash is on and select night portrait. The camera fires a quick burst of flash but then keeps the shutter open for a moment longer to allow light in. Hold the camera steady or you’ll risk camera shake. Rest the camera on a level surface if possible. Try taking pictures of the children by the Christmas tree like this. Or of the Christmas pudding as it is aflame.
If you want to take a picture of Christmas lights in a town or garden etc, rest the camera on a wall, make sure the flash is off and press the shutter. You can do this in AUTO mode. If the picture is too dark, use the TV mode (Might be “S” on some cameras) and slow down the shutter speed. Experiment until you are happy with the shot.
If you are taking pictures of people on a bright sunny day outdoors, use the flash to avoid harsh shadows. Overcast days are actually the best for photographing people. Snowy overcast days are great as colours of scarves, hats etc look really intense against the white snow.
On cold frosty days look for interesting details and zoom in close—use the MACRO setting. Frosted cobwebs, reeds, teasels etc look magical covered in frost.
Landscapes—use rule of thirds, try to lead the eye, have a clear focal point.
Monday, 18 October 2010
Get out there now!
This is one of my favourite times of year as a photographer. Crisp, clear days, a pure quality of light and an abundance of colours and fascinating subjects. If you are familiar with my photographic style you'll know that I don't usually go in for landscape photography as such, but prefer to find some detail in the landscape - whether that's a close up shot of a leaf, bark, plant etc or a feature within the landscape. I have a wonderful book by David Ward called "The Landscape Within", which has been the inspiration for many of my own shots.

Several years ago I did an assignment on Autumn as part of my A' Level in Photography. At that time I was still using a compact camera, so all the shots shown here are shot on that - a Panasonic Lumix - lovely cameras. Autumn leaves are the obvious autumnal shot and I went off to Tatton Park and Biddulph Grange in search of fiery acers. The red image on the left didn't require any special
techniques - it was just a case of framing the right shot and zooming in a little to blur the background.
 The small shot on the left is quite unusual - the sun had caught the outer branches and leaves of an acer, whilst the trees and bushes in the background were relatively dark as they were in deep shade. When I looked at this shot on the computer I decided to further deepen the shadows and brighten and saturate the leaves. Unusually for me I then applied an effect called cut out which simplifies the colour palette and emphasised the contrast between the leaves and the background (and my Photoshop skills were almost non-existent in those days!).
Although technical ability does play a part in creating a good shot (it makes it easier to achieve what you want), I strongly believe that it's having the all important eye and being constantly on the look out for an interesting composition that is the crucial factor. The shot of leaves under water remains one of my favourite images of Autumn and once I'd spotted it, it was only a matter of framing the shot and pressing the shutter (most likely all done on AUTO in those days!).


I mentioned the amazing clarity and quality of the light at this time of year - it must be something to do with atmospherics and temperature, but you can't beat a cold, clear autumnal day as far as I'm concerned. And as the sun sets earlier you are more likely to be out and about and able to get some great shots. The golden light makes for extremely flattering portraits - this is one of Abbie that I particularly like.
David Ward in "The Landscape Within" seeks out details which are different to the usual landscape shot. I tried to do the same with this shot of the Tyne Bridge at sunset. After firing off lots of shots of the entire bridge I zoomed in and focused on the idea of commuters on their way home, lifted by the wonderful sunset on the river.
As Autumn moves into Winter we'll get the first frosts (possibly sooner than we think as a cold spell is now forecast) and early in the morning the most mundane of objects is transformed by an icy coat. I love this shot of barbed wire and cobwebs and almost want to shiver as I look at the frosty fields beyond.

So dig out those scarves, hats and fingerless gloves and get out there now!!!
(And don't get me started on fungi - I spent a whole day photographing over 50 types of mushrooms - separate blog to follow!)
Wednesday, 6 October 2010
Don't let your favourite photos languish on your hard drive - get 'em out!!
 We returned from our summer holiday in Cornwall with hundreds of lovely photos of the beautiful cornish scenery, the kids playing on the beach, surfing in the sea - the usual stuff. I sort of had a plan right from the start of the holiday to do something special with the pictures when we got back, rather than leave them on the computer, never to see the light of day. We don't use albums any more (does anyone?) and we only print a few pictures out every now and again - in fact I think it's almost a year ago since we last did.
I've put lots of photobooks together for clients but never for ourselves, so this time I was determined to. As ever I took photographs every day and almost everywhere we visited and
from time to time I spent a little time in the evening jotting down a few notes about the day's events, anything funny the kids had said or the dog had done!

I was all set up when I got home to put the book together and couldn't wait to get on with it. I used Bobsbooks for the first time as they offered full double page spreads, nice quality binding and a full colour wraparound hard cover. They are not the cheapest around but I think you get what you pay for. I downloaded their software and over the next couple of weeks I did a bit of the book at a time. The software for all the different companies is usually pretty intuitive - each has its little foibles which can be frustrating at times but overall it's drag and drop your image into a standard template, move it around and resize it if you want, add some text and so on.

Well, I don't know about you but I was absolutely delighted with the finished result and was dancing around in excitement when it was delivered. The quality is great, lovely vibrant colours, thick pages and just fab! It's slightly under A4 size and now sits in pride of place on my new cabinet in the family room. Any visitors to the house get it shoved into their hands but I've not had any complaints yet!
So go on - get those pictures off your computer and do something with them. I'm already planning a lot of  Christmas presents and had better get started as I'm sure they'll get busy soon, as photo books are becoming increasingly popular and are replacing the traditional photo album. (And Bobsbooks are not paying me - I just think credit should be given where it's due!).
 Christmas presents and had better get started as I'm sure they'll get busy soon, as photo books are becoming increasingly popular and are replacing the traditional photo album. (And Bobsbooks are not paying me - I just think credit should be given where it's due!).
Thursday, 17 June 2010
Make photos while the sun shines
This sunny weather is fantastic but it doesn't half make photography tricky! Have a look at a few of my simples DO'S and DON'T'S of sunny day photography.
DO... Use your flash if the sun is high in the sky when photographing people who are in direct sunlight. Chances are they will have dark shadows across their faces which will look even darker on the photograph. make your flash fire by popping it up or switching it to "Forced flash on" depending on your camera type. (Don't forget to switch the flash off afterwards as your next shot might not need it). In the shot of Abbie and Sam on the statue at Kew I used the flash.
DON'T... make your subjects squint into the sun. Get them to turn sideways slightly.
Do... look for shady areas - umbrellas, shade of a tree etc and get your subjects to pose in the shade. You don't need the flash for this and your pictures will look very natural. In the ice cream pic and the tunnel one the kids are in natural shade and the light is nice and even.


DO... take photos in the late afternoon / early evening (or early morning if you're mad as it would have to be about 6am currently!), as the light is fantastic - the sun is lower down and the shadows are less harsh. In the photo of Abbie on the beach it was late afternoon - you can tell from her longer shadow. No flash was required and the colours are lovely and saturated.
Although mid-day can be a tricky time for portraits DO take landscape shots as the blue sky / green grass / azure seas etc lend themselves to picture postcard shots - no flash required and make sure your horizon is straight. Many cameras have a grid display on the LCD viewer that you can switch on, or you can straighten the shot up easily in PICASA and other software.
So, go enjoy the sunshine, put your suncream on and try out all these techniques. Meanwhile I'll be mostly found in my hammock with a chilled glass of wine!


Tuesday, 15 June 2010
Up close with a creepy critter

We came across this hairy beast on the boardwalk by Pickmere Lake - I'm amazed that Daisy didn't spot it and it therefore survived her passing by. The light was great - sunlight filtered by the high reeds and also bounced back up by the bleached wood of the boards. My first shot is a bit typical and although in focus and correctly exposed, it is, well, just boring!! So I decided to try another angle, which involved me lying down. The caterpillar wasn't going anywhere - frozen to the spot in fear of a strange giant - so I thought I'd play around a bit with camera settings. These shots are all taken with my compact camera - Panasonic DMC-FS12 - so no fancy lenses or kit. I set the camera to its Macro setting for a close up shot - just select the flower setting to do this. I then put the camera on the boardwalk, rather than hand holding it. This was partly to get right to eye level with my hairy model, but also because I was lying at an awkward angle and wanted to ensure I didn't get camera shake i.e. blurred picture. Then I took picture 2. This has started to look quite interesting but the point that is in focus is the middle of the caterpillar's body (where the + is).


When you select the flower / macro setting it gets your camera to start doing some quite clever things. Wherever you focus with the little square in the middle of your screen will be in focus but other areas will be out of focus - this can be a really nice effect and is called "shallow depth of field". But you really want to think about which bit of your picture is going to be in focus and which bit is blurred. In this case it would look better if the caterpillar's head were in focus. I decided to change my angle again for picture 3, looking along the length of the caterpillar and making sure I focused on its head - I actually wasn't sure which end was which so I may have focused on its bottom by accident! I still put the camera on the ground and just pressed the shutter to avoid camera shake. This is a much more interesting shot and I really love the blurry grey of the boardwalk and green of the reeds.
So next time you meet a hairy critter that is willing to model for you have a little play around with your macro / flower setting and don't be afraid to get up close and personal!
Sunday, 6 June 2010
Look for a different angle

Friday, 28 May 2010
Zoom, zoom, zoom!!

- I can take candid shots without the subject being aware. Little Mathilde had no idea I was catching this lovely moment as she crouched to examine the flower she had picked.
- It makes people less nervous when you are further away. It can be very off putting when someone points the camera right in your face (Nic - please take note!)
- Zooming in blurs the background and isolates the subject. Background objects become less distracting and the blurring can create a very pleasing effect - the blues and greens of the bluebell wood in this shot.
Many compact cameras now have great zoom lenses. My Panasonic DMC-FZ20 has a 12X zoom (i.e. a lot! equivalent to 36-432mm on a film camera) and also has built in image stabilisation. Be careful about "optical" zoom and "digital" zoom when you use your compact camera to zoom in. The optical zoom uses the lens to make the subject closer. Digital zoom isn't really zoom - it's actually just magnifying part of your image, a bit like zooming in on a picture on your computer screen to look at it closer. Image quality isn't as good once you start using the digital zoom so I usually avoid it. I can set my compact camera to only use the optical zoom but on some compacts the digital zoom kicks in after you have zoomed in as far as the optical zoom lets you. There's often a slight pause and you have to click/ press to zoom digitally. If I've lost you, then just look it up in your manual and have a go with your camera.
Otherwise, just get zooming, fill the frame and enjoy getting some lovely candid shots!
Monday, 26 April 2010
Use flash when it's really sunny outside

Have you ever taken a picture on a sunny day and wondered why faces are so dark even when they didn't really look that way? With bright sunlight you also get very dark shadows. We don't see the contrast as starkly as our brains are used to reducing the effect. If the person you are photographing is standing against a very bright background - sky, snow, beach, in front of a window - then their faces may be in dark shadow unless you use the flash. I used flash in the picture above to make Abigail stand out against the blue background and to reduce the shadows. This was taken with my Panasonic Lumix DMC-FS12 compact camera.
Depending on what camera you are using you may have to "make" the camera fire the flash. On a compact camera on your flash settings you should be able to select "forced flash on". On a hyrbid or SLR you should be able to pop the flash up.
Try the shot with and without the flash and see which you prefer. Don't forget to put your flash back on AUTO once you have finished.
Subscribe to:
Posts (Atom)