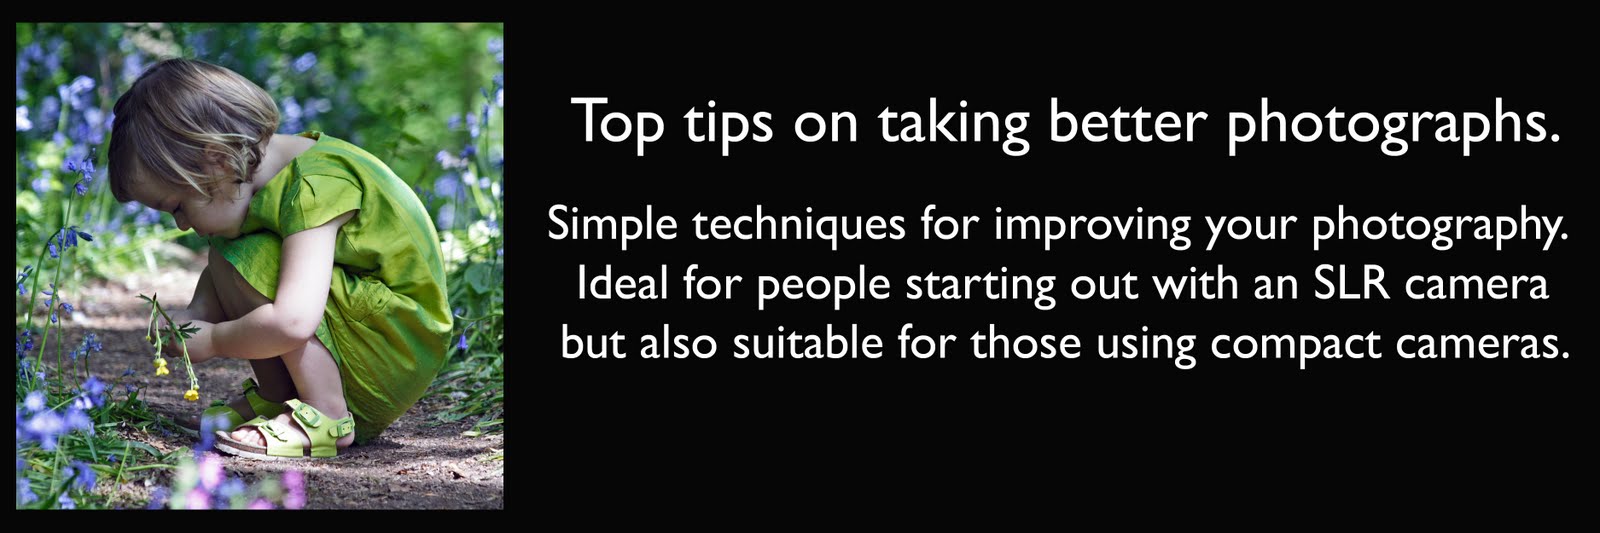
Thursday 17 January 2013
Top Tips is moving!
In future I will be posting top tips in Picture It Blog - trying to make life less complicated! So please hop over to my main blog from now on!
Tuesday 8 November 2011
Venice revisited and revamped

I was a keen amateur photographer back in those days and took oodles of very average pictures whilst we were in Venice. I was pleased with a handful of them (I've even sold one or two!) but had relegated the rest to a sub folder somewhere in the bowels of my computer hard drive. Today's book purchase inspired me to unearth and reappraise my Venice "snapshots", with the knowledge that these days I am more of a dab hand at editing images.
And I was very pleasantly surprised! With a little cropping, tweaking of exposure, levels and brightness I found I had around 20 very nice images. They're not of a professional standard and I'd hope that nowadays I'd produce much better, but I've been able to create a very attractive collage of memories that will eventually adorn the walls of our downstairs loo!

This is the final collage - I'm going to get it printed at around 30cm x 30cm. I've stolen the quotes from Tessa Kiros' book - I hope she doesn't mind as it's only for our loo - but they epitomise our weekend in Venice, especially the part about getting lost but it not being a problem. We set off from our lovely hotel each morning and just walked and walked. We stopped to eat when we were hungry, whiling away a few hours in cosy little bars serving prosecco and cicchetti (delicious bites!). We usually didn't have a clue where we were and only consulted a map when it was time to find our way back.
Just as a comparison I've created a collage of the images before any editing, to show just what a few simple tweaks can achieve. It makes an OK collage, but the final version (above) is much more vibrant and punchy, I like the occasional use of black and white and I love the addition of the quotes.

If you'd like to learn how to create very simple but really impactful and personal pictoral memories of special events in your life just get in touch. I run one to one tuition sessions at very reasonable prices. http://www.picture-it-big.co.uk/Onetoone.html. Even better get someone to treat you to it - I have gift vouchers too. All those photos should not be languishing hidden on your computer when they could be bringing back nice memories every day!
Monday 7 November 2011
Should I buy an SLR camera?
I get asked this all the time when I’m teaching people with compact cameras, so I decided to try to write a blog that will help you make that decision before you part with your hard earned cash.
Firstly let’s take a quick look at the types of camera out there as it may be surprising to some that compact cameras and SLRs are not the only options available.
Compact camera: Often referred to as a “point and shoot” camera and is designed for ease of use and convenience. It does not offer interchangeable lenses, has a built in flash and has many automatic modes to make picture taking as simple as possible. Some do feature options for controlling aperture and shutter speed and there are some with extremely good lens or optic quality.
(I’ll do SLR next although really it should come last as you’ll see shortly).
SLR camera: stands for Single Lens Reflex but you don’t really need to know that! It uses a system of moving mirrors to allow the photographer to see exactly what they are going to capture (What You See Is What You Get – WYSIWYG). Non SLR cameras (the other three types discussed here) do not use this mirror system. SLRs also allow you to use interchangeable lenses, have full control over aperture and shutter speed, use manual as well as auto focus and use additional filters and flashguns. Basically you get more control and can be much more creative than with a compact camera.
As I said earlier these are not the only two options and the alternatives are well worth taking into consideration.
Bridge Camera: bridges the gap between compact cameras and SLRs, hence the name. Bridge cameras are often a similar size to small or entry level SLRs and have common features. They do not have interchangeable lenses and usually have a lower ISO range (meaning that they won’t perform as well in low light). They have a fixed but very versatile lens which allows you to photograph close up and wide angle through to telephoto, with the zoom limit often being very high.
Compact System Camera: More recently manufacturers have brought out a fourth option designed to have interchangeable lenses and all of the flexibility of an SLR but in a much more compact body.
So now that you know about four options instead of just two, how on earth do you decide which is the right one for you?! I’ve used all except the newer compact system camera (if any of the manufacturers would like me to do a review of one, feel free to pop one in the post!) and they’ve all got their place in the market. It really comes down to what sort of photography you want to do, how much money you want to spend and whether you like carrying and changing lenses or just prefer one that does it all.
Perhaps describing how I use my cameras will shed some light. I stick my compact camera in the bag whenever I’m going out with the kids and might want some quick snapshots. I know there’s quite a delay when I take pictures, I can’t get the nice soft focus background shots I love and I can’t capture close ups of faraway things. However, in good daylight conditions it delivers great quality snapshots. I have also done some really nice close ups with it. Shots taken with the flash aren’t great, but then I am used to using an SLR with external flash gun.
I use my bridge camera when I want to get better quality pictures than with my compact but don’t want to carry additional lenses. A good example of this was on a recent holiday to Cape Verde where I didn’t want to risk taking an SLR and all the lenses. Sandy beaches and SLRs don’t mix well! My bridge camera has a 20X zoom so I knew I could get some good candid pictures of the kids playing in the pool and on the beach. It also does some great close ups with soft focus backgrounds and the image quality is better, sharper and crisper than the compact. It also has an optical viewfinder which I prefer to the LCD screen.
I bought this bridge camera as a natural step up from a compact, when I was still an amateur photographer stuck on AUTO. I first started to see the limitations of it when I began an A Level evening course. I had my first play with an SLR and loved the quality both through the lens and in the final images. And of course there’s no delay when pressing the shutter (no more missed action shots!). Once I had tried a macro lens and an external flash gun I was hooked – there was no going back. However hard I tried I could not achieve the same quality of images or creative effects with my compact or bridge camera.
SLR cameras also allow you to shoot in RAW as well as JPEG. This gives you much more control when editing your pictures afterwards, a must for a professional photographer (some bridge cameras do offer this format as well).
If speed and image quality are important to you, if you’d like to enlarge your shots for display on the wall or enter them into competitions then you should probably go for an SLR. But only if you are prepared to spend money on additional lenses. The “kit” lens that usually comes with an SLR does not allow you to take real close up shots nor does it zoom very far, so you’ll soon find that you need at least one additional lens. You can buy lenses that have a similar wide range to bridge cameras (e.g. 18mm-200mm) but the quality is not as good as dedicated close up, wide angle or zoom lenses. I soon found that I needed a macro (close up) lens and a zoom lens. But then I’m selling my images. If I was an amateur photographer on a budget the one “Jack of all trades” lens is perfectly adequate, certainly when you first start out using an SLR. You can also save money by buying generic lenses such as Tamron or Sigma and by buying second hand.
For me, using an SLR feels like a “proper” camera – I can look through a view finder, it instantly takes the picture when I press the shutter button and has a real and satisfying feel, it’s fast and overall a more quality experience. If automatic modes fail to give the result I am looking for I can take control and make fine-tuned adjustments. A bridge camera can do this too but the quality is generally not as good, with more noise (speckled dark areas) on the final image and just not as crisp and punchy. I know that if I use a particular lens with my SLR I can achieve a particular result – it gives me much more control.
I can’t truly answer the question of SLR cameras versus the new compact system cameras as I’ve yet to use one and can only rely on the reviews I’ve read. They seem to have a place in the market, based predominantly on compact size and being light weight, but opinion seems to be that although very good, they don’t always perform as well as SLRs in the more challenging lighting conditions.
All my cameras have their place and role to play and I'm sure I could come up with an argument to add a new compact system camera to my kit bag! If I was forced to give them all up except one I would hang onto an SLR - and it would be my mighty Canon 5D - I'll blog on why it knocks the socks off my 350d and 40d another day!
Whatever you decide to do, make use of the internet and read lots of reviews. Stay away from manufacturers’ reviews initially as they will be biased and stick to web sites that offer independent reviews e.g. http://www.cameras.co.uk/ but there are many others.
Jane Burkinshaw www.picture-it-big.co.uk
Monday 4 July 2011

So, anyway, there I was today teaching her and her two friends how to take better photographs with their new SLR cameras. They were typical of the people I teach - they know how they want their pictures to look but get frustrated as they don't know how to achieve it. They consider their good pictures to be lucky snapshots. As ever, they are hard on themselves and have usually got a good eye for a nice image. Husbands and dads have tried to explain about apertures and shutter speeds but somehow the penny has never dropped and the camera has stayed on the fully AUTO mode (little green square).
By the end of my training sessions people usually tell me that I have cut through all the jargon and made it all make sense. Catherine commented today that she hadn't known what anything on the screen on the back of the camera had meant and that she was going away able to interpret it all and say what ISO setting she was on and why and what shutter speed and aperture she / the camera had used. Things like Auto White Balance and Exposure Compensation now made sense.
On week days I train at an amazing venue - Davenports Farm Shop at Bartington on the A49. The staff are very friendly and accommodating, giving over an entire room free of charge in the Alice in Wonderland themed tea rooms to me. The choice of tea and coffee is dizzying but Belinda will guide you through and select the best one with you and all the food is locally sourced and freshly prepared by Belinda and her husband. The cakes are to die for - I drooled so much over the miniature cakes served to two ladies nearby that they donated the ones they couldn't quite manage to us!
I combine the classroom sessions with practical exercises outside and Davenports has oodles of interesting subjects. Today we concentrated on the outdoor chess set, practising using the Av mode to set different apertures to increasingly blur the background and also seeing how zooming in compresses perspective. On previous courses we've photographed the ostriches and alpachas, flowers, fruit and veg, old fencing - the opportunities are endless.
A 4 hour course costs £100, whether it's one person or 3, so getting some friends along to share the cost obviously makes sense. 2-3 people is ideal to get sufficient 1:2:1 attention, but also to generate a buzz and good atmosphere. If you like the sound of it get in touch and we'll sort out a convenient date. I can tailor the courses to suit particular interests e.g. portraits / close up flowers etc. All in all I am always told that it's a great day out and very informative and practical.
Wednesday 25 May 2011
New Digital Photography Taster Courses for 2011
If you want to take great pictures you need a lot of expensive kit and you need to understand all the technical stuff - don't you?
No, not necessarily. Of course great quality cameras and lenses and an understanding of how to use all the settings can help you to produce fabulous images. But if you don't know some basic rules or tips then it doesn't matter how good your kit or technical knowledge is. Occasionally I leave all my SLRs, lenses etc at home and just take my Panasonic DMC-FS12 compact with me to remind myself of the basics. I also like to demonstrate that you can get some really good shots with a compact camera.
 |
| All these shots were taken with a compact camera |
This led me to thinking about how easy it is really and how everyone can take good shots if they just have some simple tips and techniques.
That's what's inspired me to run some taster courses in 2011. I love running courses - so much so that I'd do it for free if I could, but I have bills to pay, cosmetics, shoes and clothes to buy!
The idea of these taster courses is to give people some completely non-techie knowledge that they can go out and put into practise straightaway and see an immediate improvement in their photographs.
If this sounds like it's for you please get in touch. I'm running two courses - one in June and one in July. Details are on my web site. The taster courses are just £20 per person for two hours.
If you're ready for for the next step - getting off the AUTO button and finding out what all the different settings do then take a look at the workshops and small group courses I offer.
To book or find out more contact Jane on 07868 750505 or via http://www.picture-it-big.co.uk/
Thursday 7 April 2011
How to take great pictures of babies

From the moment they explode into our lives babies are amazing! For something so small they have a massive impact on everything we do. Life as we knew it ceases to be and the world revolves around them. We are totally governed by their every need and mesmerized by their very prescence. Go on, admit it, you've idled away many a moment just watching your precious new arrival sleeping and breathing. It's no surprise that we take literally hundreds of photographs, trying to capture every expression and moment. And it's not easy is it?! New babies sleep for England and when they're awake their eyes can't focus and can look a bit bozz eyed for the camera! Well, here's a few helpful hints to ensure that you make the most of this magical, albeit brief time.
Photograph newborns when they're asleep... because it's easier and also because they look so cute! In the first two weeks a newborn baby will still tend to curl up its legs and arms when asleep and it's such a beautiful pose. It's nice to get one or two shots with eyes open just to be able to remember how they looked, but concentrate on sleeping poses. The best time is when baby has been changed and fed and has gone into a deep sleep. I'm sure you've realised that nothing short of an explosion will wake them and it's surprisingly easy to move them into nice positions.
Turn your camera flash off... and put your baby in a snuggly, safe and warm place where the natural daylight from outside is falling onto them. Avoid areas of bright sunlight as it creates harsh shadows. My children used to have a crib under the living room window and in the afternoon the light was wonderful. Hold your camera nice and steady, lean against a wall for extra support if possible.

Photograph hands and feet... and include your own hands for a sense of scale and to create a picture full of emotional impact. Zoom in nice and close or use the Macro setting on your camera. Check where you are focusing so that the right part of the picture will be in focus - read my previous blog post to find out more (scroll down to the next blog).
If you've enjoyed my blog please leave me a comment! If you're interested in photography lessons or know someone that would like a newborn shoot then please just get in touch with me!
Tel: 07868 750505
Thursday 17 March 2011
Are you making this basic mistake when taking photographs?
When I run courses and one to one sessions on Digital Photography I find that most people are making the same fundamental mistake. And don't get me wrong, I don't think they're idiots - in fact they are intelligent individuals who are keen to improve their photography skills. The blame lies with the people who write camera manuals that are laborious to read and full of jargon. I always advise people to put the manual away and a) come on one of my workshops (of course!) and b) read some of the photography books I recommend. Once you've got some basics on board, then the manual starts to make a bit more sense, but is best used as a reference tool - look things up as you need to but don't try to read it from cover to cover.
If camera manuals were well written they would start with a few simple bits of information that would get you started on the right path, but this stuff is usually hidden deep in the manual and called something technical!
So, here's the "biggie" mistake you may be making with your point and shoot compact camera. When you just point your camera at your subject and press the shutter, the camera always focuses in the middle of the frame and that's what will be in focus. 8 times out of 10 that may well be absolutely fine. But what if you are photographing two people and there's a gap between them? Your camera will focus in between the people, making the background in focus and the people blurred. Go on, be honest, you've done this before haven't you!
Did you know that you can focus on one of the people, press the shutter halfway down until the green light comes on and the camera beeps, telling you that it has focused, then keeping the shutter button pressed halfway, move the camera to frame both people and then fully press the shutter down to take the picture. If you practise this a few times, it's really easy and then eventually becomes second nature.

And once you've got the hang of it, you can start to put people, objects etc to one side of your picture and not in the middle. Radical! An example of this might be if you're photographing someone with a lovely landscape behind them. Try putting the person to one side. This may also have the lovely effect of keeping the person in focus whilst the landscape is softly out of focus. In the example below it is our lovely Daisy sulking as she watches people playing on the beach below (no dogs allowed), with St Michael's Mount in the background.
 This technique is called FOCUS LOCK - sounds scary doesn't it? But it's so simple and so important!Look it up in your manual now that you know what it is.You can then start to get creative and take pictures of all sorts of things with the point of focus wherever you want it to be. And practise it - after all you can just delete any that don't work.
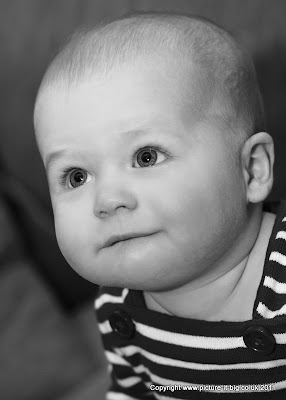
And if you're taking close up pictures of people's faces ALWAYS makes sure you focus on the eyes. If the eyes aren't in focus your picture just won't work.
If you found this interesting and useful please let me know - tick a box below the post and write a comment. If you want to know about my courses visit my web site http://www.picture-it-big.co.uk/Courses.html
If camera manuals were well written they would start with a few simple bits of information that would get you started on the right path, but this stuff is usually hidden deep in the manual and called something technical!
So, here's the "biggie" mistake you may be making with your point and shoot compact camera. When you just point your camera at your subject and press the shutter, the camera always focuses in the middle of the frame and that's what will be in focus. 8 times out of 10 that may well be absolutely fine. But what if you are photographing two people and there's a gap between them? Your camera will focus in between the people, making the background in focus and the people blurred. Go on, be honest, you've done this before haven't you!
Did you know that you can focus on one of the people, press the shutter halfway down until the green light comes on and the camera beeps, telling you that it has focused, then keeping the shutter button pressed halfway, move the camera to frame both people and then fully press the shutter down to take the picture. If you practise this a few times, it's really easy and then eventually becomes second nature.

And once you've got the hang of it, you can start to put people, objects etc to one side of your picture and not in the middle. Radical! An example of this might be if you're photographing someone with a lovely landscape behind them. Try putting the person to one side. This may also have the lovely effect of keeping the person in focus whilst the landscape is softly out of focus. In the example below it is our lovely Daisy sulking as she watches people playing on the beach below (no dogs allowed), with St Michael's Mount in the background.

And if you're taking close up pictures of people's faces ALWAYS makes sure you focus on the eyes. If the eyes aren't in focus your picture just won't work.

If you found this interesting and useful please let me know - tick a box below the post and write a comment. If you want to know about my courses visit my web site http://www.picture-it-big.co.uk/Courses.html
Subscribe to:
Posts (Atom)